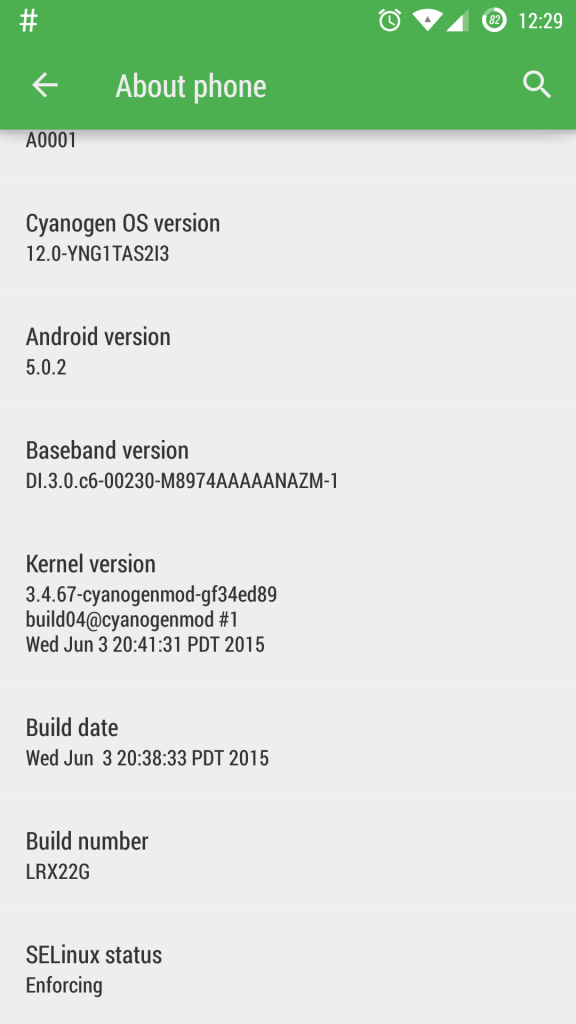
OTA updated released, but some of us are have issues while updating with custom recovery. No worries, there is a way to update without formatting or losing anything. Yet we will not be using incremental update file, but full ROM file.
Currently my OnePlusOne is running YNG1TAS17L, is rooted and has xposed, plus camera from coloros. Bellow are steps how to update and keep all what you already had:
1. Firstly download Full ROM, not and update. You can do that from here.
2. Download Xposed from here.
3. Make sure that “Settings”->”Developer options”->”Update Cyanogen recovery” is off. Because if not you will lose custom recovery and will have some extra headache in getting Xposed.
4. Reboot to recovery. Wipe – Advanced Wipe. Mark Davlik Cache and cache. Then pull “Swipe to wipe”. DO NOT FACTORY RESET.
5. Flash YNG1TAS2I3 zip downloaded in step 1.
6. Wipe cache & Dalvik cache. Yes, again. Root when prompted by TWRP.
7. Reboot and wait until it loads. It will take some time to boot and optimize, plus upgrade apps. For me it was ~10 minutes.
8. Once load is completed, reboot back to recovery.
9. Reboot to recovery. Wipe – Advanced Wipe. Mark Davlik Cache and cache. Then pull “Swipe to wipe”. DO NOT FACTORY RESET.
10. Flash Xposed zip which you downloaded in step 2.
11. Wipe cache & Dalvik cache. Yes, again.
12. Never Settle.


I am currently on YNGTAS17L. Can I use this HowTo and do an update directly to YOG4PAS1N0 (i.e. skipping the YNGTAS12i3 update)?
Theoretically that should work, as this is so called dirty flash which updates all files needed, while keeping your information.
I would recommend to make a backup before doing that, but I believe that should work.
I followed the instructions skipping ones regarding xposed but every time I try flashing the update I get an error message in red saying “Zip signature verification failed : 1”. :/. Suggestions, please?
Can I skip zip file signature verification altogether by unchecking the option before I swipe to flash the rom file?
You do not need to check verification, do not mark it, if it still fails you could try to use TWRP v2.8.5.1
Thanks for the help man. It was smooth sailing after i unchecked the verification..
Hey,
What about apps,will they be removed once I update using this method?
No, everything will stay.
Can I use this procedure to go from 11s to 12s without factory reset and data wipe? I have a rooted phone with TWRP and Xposed and I’ve been really reluctant to wipe everything to update. But this instruction looks like the only provision for those who do not want to wipe stuff for every update.
Unfortunately I can not be sure, have not tried that. I always like to go clean during major releases. Theoretically you might be able to do that, that would be so called dirty upgrade.
I would recommend to make backup of your current Android and only then attempt to do that.
Before you try to update, make sure that you disable all xposed frameworks, some might not be compatible with Lollipop and cause boot loop. Of-course you will need to re-install xposed framework anyway.
I did step 4 but step 5 gives me an error. So basically installation doesn’t go through.
What do I do?
You will have to be more specific. What error you receiving? Which version of TWRP you are using?
Worked perfectly, I really didn’t want to reload everything or deal with titanium backup. I gave up on exposed till this as well. Awesome putting supersu in there! your the man
Thanks!
Hi, I am not able to download XPOSED from the given link in Step 2. Getting error message – “Invalid Attachment specified.”
Strange, it is working for me, maybe forum is down which host file.
Solved! with TWRP 2.8.5.1 the swipe button was working and the installation succesful! Thanks a lot!
Great.
Install failed. i tried using TWRP 2.8.7 for recovery can´t swipe with it, the swipe button simple doesnt appear. Then i tried with TWRP 2.7.7 and the swipe button appearead but the installation failed… Which TWRP version are you using? Thanx!
I currently have TeamWinRecoveryProject v2.8.5.1 worked like a charm.
I do not have xposed on the phone, can I skip the steps for xposed and still use this guide?
Yup, then you need only steps 1 3 4 5 6 7
Thanks much. It worked perfectly. 🙂
I’m rooted and am on the current latest build yng1tas2i3,
1. Reboot to recovery.
2. ThenWipe – Advanced Wipe. Mark Davlik Cache and cache, then pull “Swipe to wipe”.
3. Flash Xposed zip which i downloaded from link above.
4. Wiped cache & Dalvik cache.
5. Turned off the device and then powered on, took a while to enter menu as things were updating 173/176 updates and yet i wasnt able to find xposed installed.
Steps are for upgrading OnePlus One from previous Android build to latest for users who already had Xposed installer.
You already did half of Xposed installer, yet now you lack application it self. Simply download and install this file Xposed APK Then reboot device again, after each module install and enabling you must reboot again to make it active.
Thanks for the steps. I’m yet to do it. Before that, I’ve a question. I already have Xposed flashed in my mobile. Do I still need to continue the steps from 9 to 11 as well?
Yes you do need. After you flash ROM, xposed will no longer work, as result you need to re-flash it. Modules will stay intact.
Ok. Thank you for the prompt response. Let me do these steps some time later and let you know.
Thank you Friend. I did as mentioned by you. Mine is now with the new incremental update YNG1TAS2I3. All data, apps remains intact.
Congratulations
Great HowTo! Worked like a charme, just takes a while to complete…
Thanks for publishing this.
Is there any data loss by using this method ?
Nope. SMS/APPS/Game progress/Xposed frameworks and etc all intact.
I have a question! Why is it necesary to flash Xposed? what is that for? and i flashed the ROM but i cannot send text messages =/ any idea how to fix this?
xposed is an app which allows to add more features to the ROM. Regarding message sending contact your service provider.